
Snickerdoodle Cookies (Vegan, Gluten-Free, Soy-Free)

This post may contain affiliate links, which means I may receive a commission at no cost to you if you click and make a purchase.
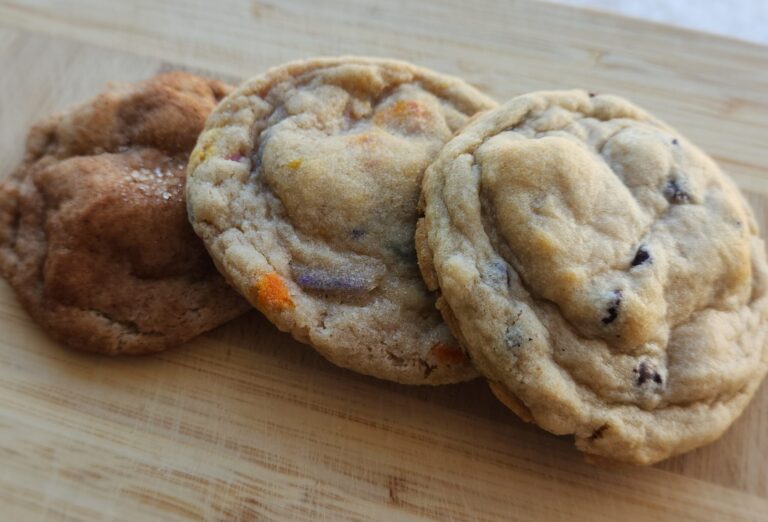
A sweetly spiced taste of the classic snickerdoodle cookie. The softness will melt in your mouth as the cinnamon touches your tongue. Made with vegan, gluten-free and soy-free ingredients

Ingredient Suggestions
Gluten-Free Flour – I am a big advocate for King Arthur’s Measure for Measure Gluten-Free Flour. It works so well in all my professional and personal baked goods. You can try other gluten-free flour brands, but make sure it is equal to all-purpose.
Plant-Based Butter – If you are not concerned about the soy, you can use any brand of plant-based butter. For my recipes that can be soy-free, I would use Country Crock’s Plant Butter with Avocado Oil. Always check the labels, as companies change ingredients occasionally.
Sugars – If you are a vegan, you likely know that not all sugar is vegan. I used cane sure which is less refined and larger crystals that help with gluten-free baking. My favorite brand is Zulka. As for brown sugar, I purchased Aldi’s Baker’s Corner brand. Their sugars (granulated, brown, and powdered) are all considered vegan.
Plant-Based Milk – You can use whatever plant-based milk you are comfortable with. Avoid soy milk if you are making the recipe soy-free. You can also substitute the plant-based milk with water if you are avoiding nuts and seeds.
Vanilla – When it comes to vanilla, go pure, not imitation. And to take it a step further, use powdered vanilla. You will taste where that little added expense went.
Cinnamon – Any cinnamon spice will do. Make sure there are no cross contaminations listed on the label and the only ingredient is cinnamon.
Cornstarch, Baking Powder, and Baking Soda – Make sure these are fresh. If they are over six months old, it is best to toss them and buy a fresh supply. Also, check the ingredients to ensure they were not processed in a facility with other wheat products. I used aluminum-free baking powder. My preferred brand was Whole Foods 365.
Other Tips and Tricks
Thick vs. Flat Cookies – As a cottage baker, I always baked from frozen, which creates a thicker cookie. If you bake from the fridge, it will spread more and become a more traditional, flatter cookie. Both are delicious but it all depends on your time and preference.
Refrigerating Dough – Never skip this step. I used to be an impatient baker, wanting my cookies now, not later. But when using gluten-free flour, it needs time to absorb the moisture before you bake them. If you do not let it rest, it will come out chalky and grainy.
Time to Rest – Do not skip this step either. Cookies continue to bake even after you take them out of the oven. Letting them rest on the hot baking sheet for another 30 minutes gives them more time to fully bake. Even after transferring them to the cooling rack, give them some time to cool completely before eating. I know it’s hard. But trust me, it is worth it. Even refrigerating them to make them firmer makes them even better.
Weighing Ingredients – I highly recommend weighing certain ingredients such as the cane sugar, brown sugar, and gluten-free flour. It is more accurate and will yield better results. It is not required, though, but is a game changer in consistent measuring.
Rotating Cookie Sheets – No oven is perfectly heated, and to avoid hot spots, or undercooked areas, rotate your cookie sheets mid-bake. I always started with my racks on the middle and lower level. One sheet will be vertical on the middle rack on the right and the other on the lower rack to the left. I would set a timer halfway through, then change racks and turn them both horizontal.
Spreading Cookies – Cookies can spread, giving them an unappealing shape. This is due to too much fat, ingredients not being mixed thoroughly, temperature differences within your oven, etc. A quick fix is to swirl a circle around your cookies with a baking ring, cup, or even a cookie cutter once they come out of the oven.
What if I am not vegan or gluten-free?
My recipes are tested with vegan and gluten-free ingredients. You are welcome to substitute ingredients according to your dietary preferences. Here are some suggestions for this recipe.
If you are not vegan, you can use regular butter and chocolate chips for substitutions. Since I have not baked this recipe with regular butter, the cookies may spread more because of the added fat. Different sprinkles should not affect the results of the recipe.
If you are not gluten-free, you can use all-purpose flour but will need to add a little extra (approx. 1 tbsp to 1/4 cup). Gluten-free flour requires more moisture, so less is used in recipes so that it will not come out dry and crumbly.

Snickerdoodle Cookies (Vegan, Gluten-Free, Soy-Free)
Ingredients
Equipment
Method
- Measure brown sugar and cane sugar and add to mixing bowl.
- Add plant-based butter and cream together with paddle if using a stand mixer.
- Mix in vanilla, cinnamon, and plant-based milk or water.
- In a separate bowl, measure all dry ingredients and mix together.
- Add dry ingredients to wet ingredients and combine thoroughly with the dough hook if using a stand mixer.
- Cover bowl and refrigerate dough for at least 30 minutes.
- Mix together the cinnamon and cane sugar for the coating.
- Preheat oven to 350℉ and line two baking sheets with silicone mats or parchment paper.
- When dough is thoroughly chilled, divide into 24 equal-sized balls between the two baking sheets giving them room to spread.
- Roll each dough into the cinnamon sugar coating.
- Bake for 9 to 11 minutes, rotating cookie sheets halfway through. Cookies should be lightly browned and not shiny.
- Let cookies rest for an additional 30 minutes on baking sheets once removed from oven.
- Transfer cookies to cooling racks and allow to cool for another hour.
Notes
- Cookies are good for up to five days in the refrigerator or 60 days in the freezer in an airtight container.
- Cookie dough can be frozen into balls to be baked later. You can thaw the dough balls before baking, or bake from frozen at 375℉ for 12 to 14 minutes. This will result in a thicker cookie. Do not add cinnamon sugar coating until you are ready to bake.
- Although weighing ingredients is recommended, it is not required. Weighing gives a more consistent measurement which is good for selling baked goods.
- A stand or hand mixer is not required. You can manually mix the dough and knead in the dry ingredients. Just be ready for a workout!